Halo H7RICT, 6 logements IC Remodel Logement 120 V tension de ligne chacun

Brand:HALO

3.4/5

51.70

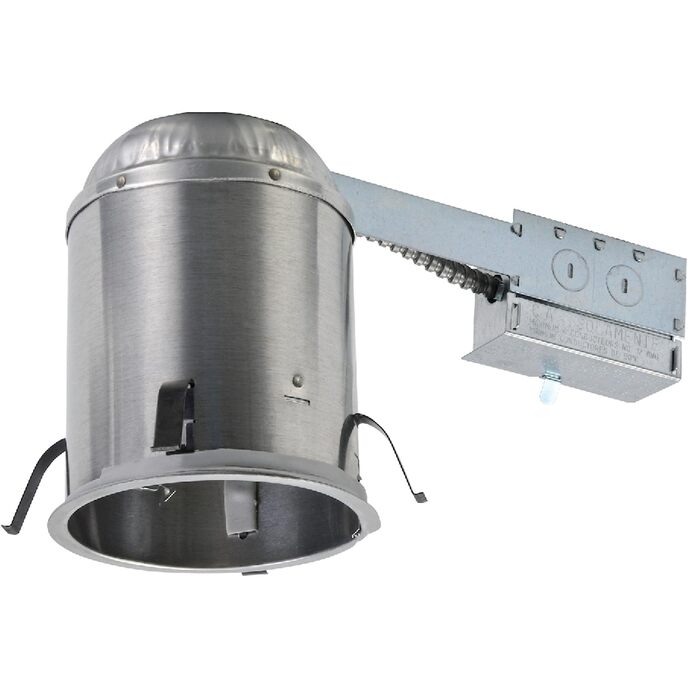
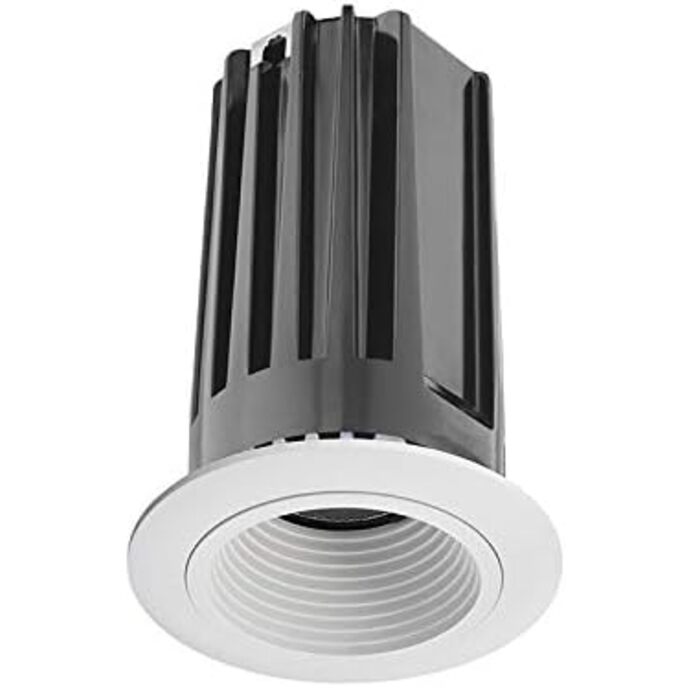
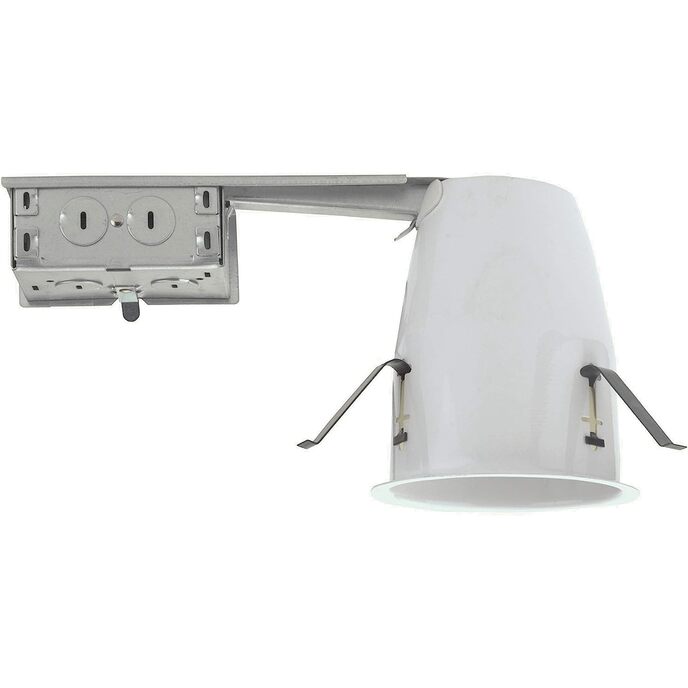
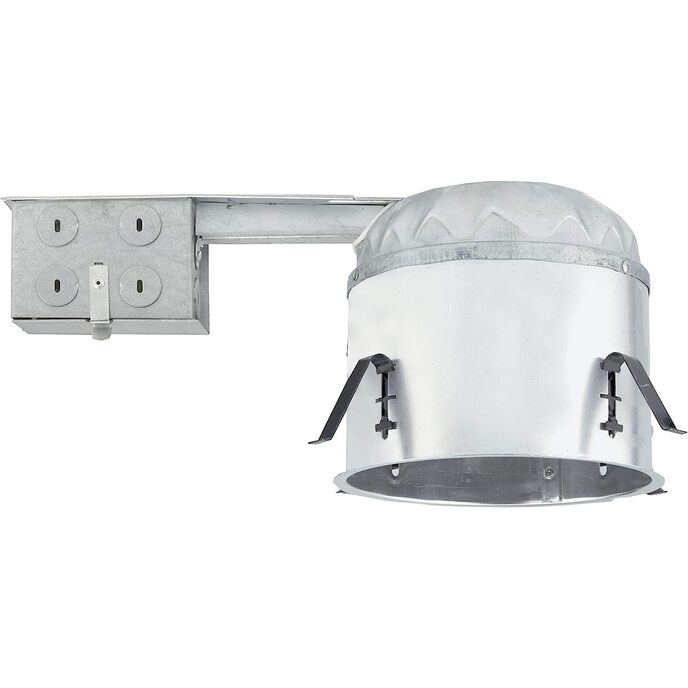
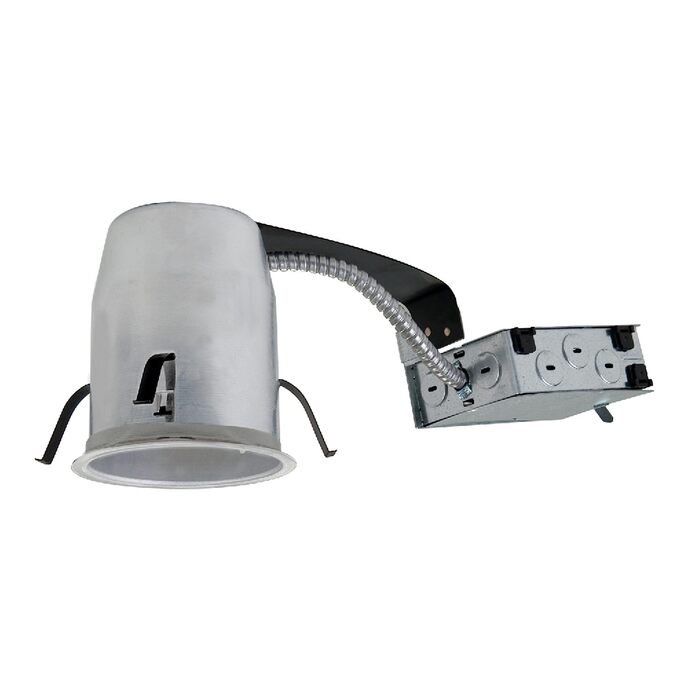
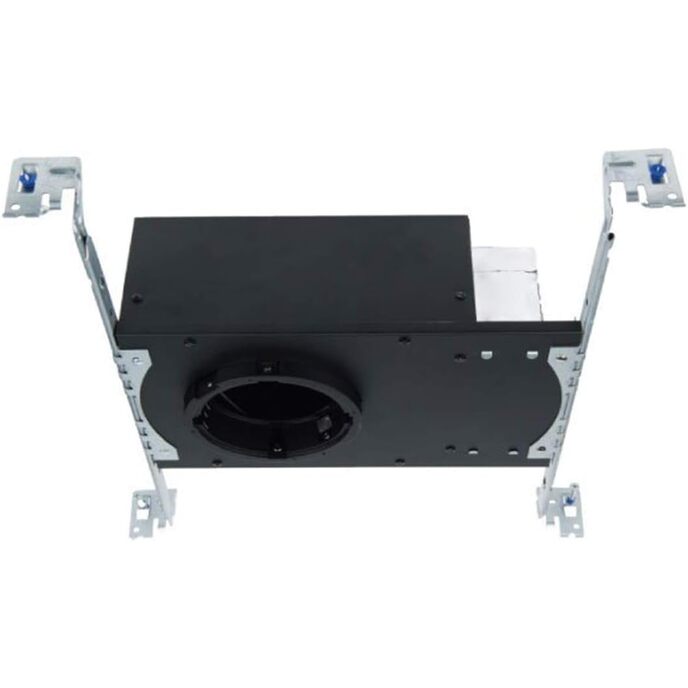
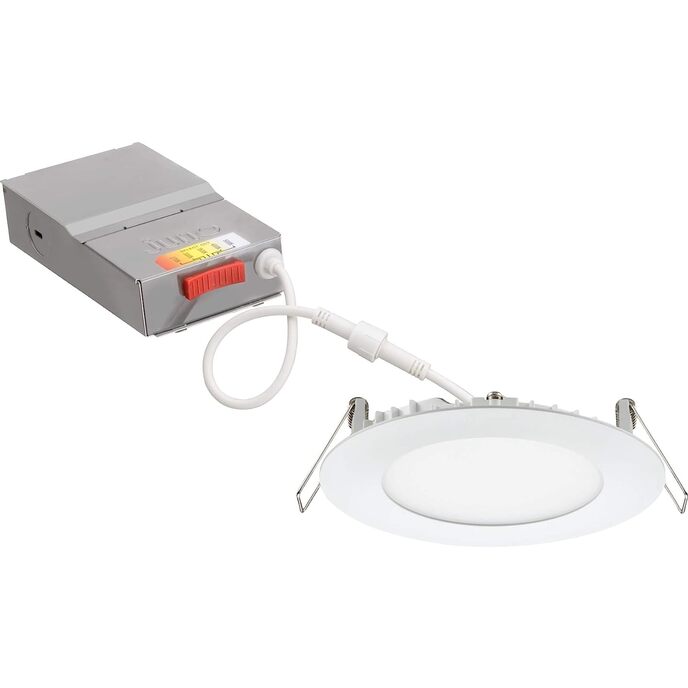
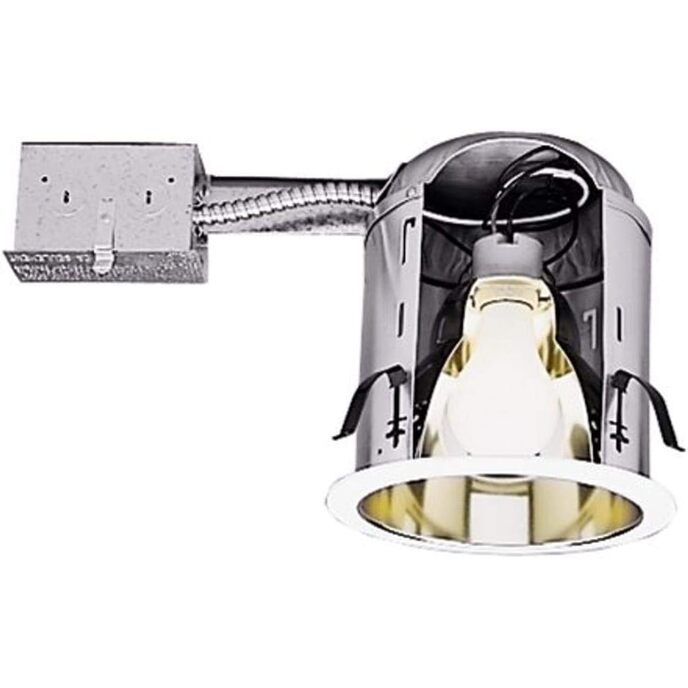
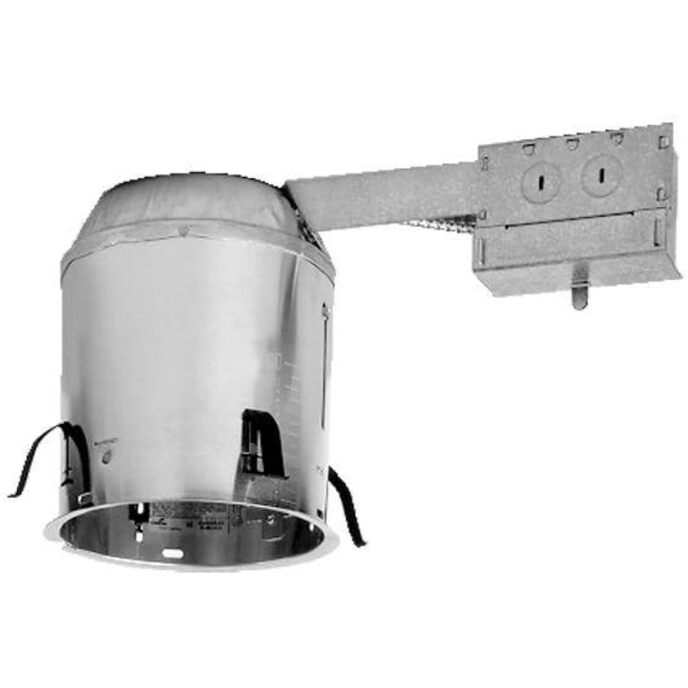
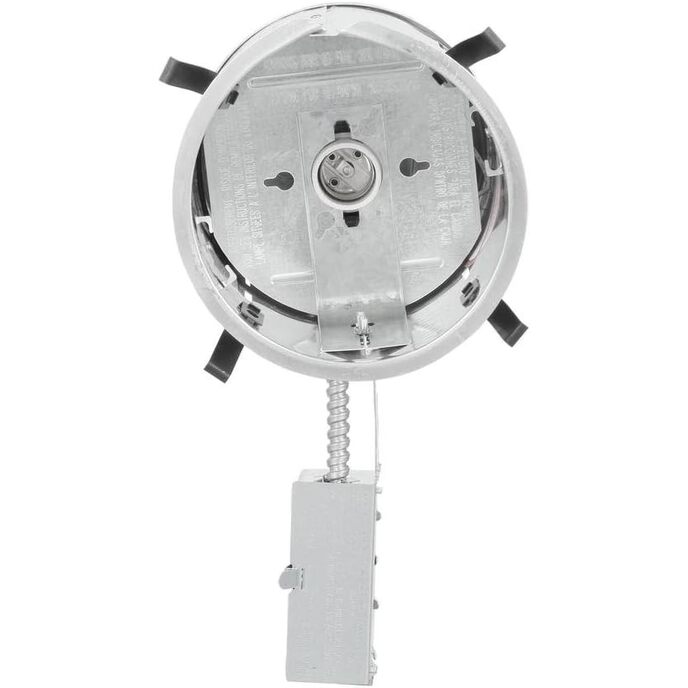
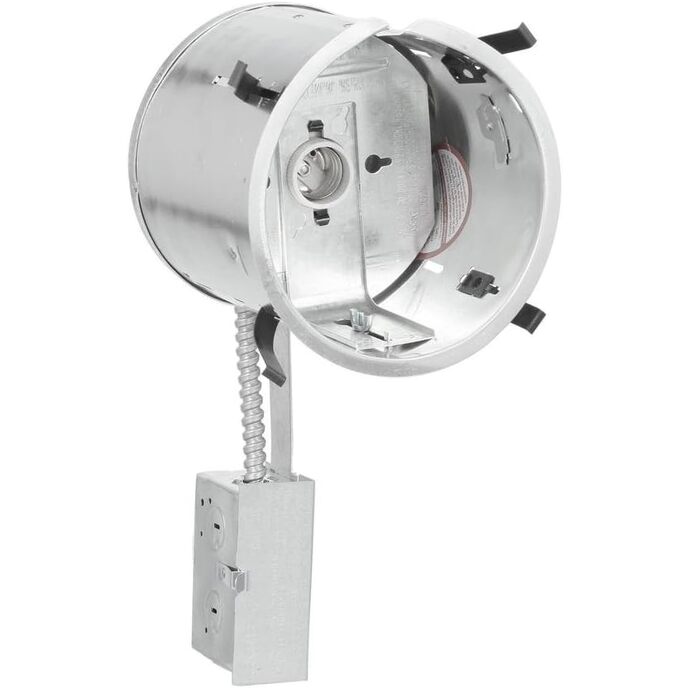
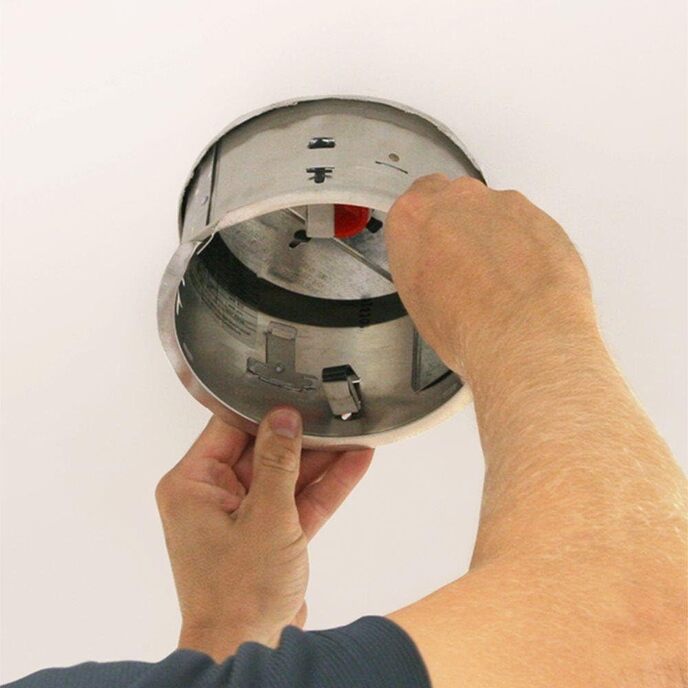
DESCRIPTION DU PRODUIT Le HALO H7RICT est un boîtier de plafond isolé construit en aluminium et conçu pour les applications de rénovation où le boîtier sera en contact direct avec l'isolation du plafond. Le protecteur thermique intégré intégré offre une protection positive contre les chevauchements. Ce boîtier encastré comprend également un support de douille réglable pour assurer un positionnement correct et cohérent de la lampe. La hauteur de 7 1/2 po du boîtier permet une utilisation dans une construction à solives de 2 po x 8 po et une bride intégrale fixe le luminaire contre le plafond. 4 clips de rénovation sécurisent le boîtier et s'adaptent à une épaisseur de plafond de 1/2 po à 5/8 po. Approuvé UL et certifié CSA, le H7RICT simplifie tout projet de rénovation. AMAZON.COM Le H7RICT est le luminaire à choisir si vous souhaitez une solution d'éclairage à plus grande ouverture (15,2 cm) à utiliser dans un projet de rénovation où le boîtier entrera en contact direct avec l'isolation. Le H7RICT vous offre une certaine flexibilité dans l'éclairage et l'apparence. . La grande variété de garnitures disponibles avec la famille de boîtiers encastrés H7 de Halo vous permet de faire correspondre votre décor, votre finition et les effets d'éclairage souhaités. De plus, le support de douille réglable vous permet d'utiliser une gamme de différents types de lampes. Halo facilite l'installation grâce à une gamme de fonctionnalités utiles. Le H7RICT peut être installé sous le plafond à l'aide des clips de remodelage inclus (ceux-ci acceptent les matériaux de plafond de 1/2 et 5/8 pouces). La douille en porcelaine à position fixe avec coque à vis permet un positionnement constant de la lampe, et trois connecteurs Quick Connect éliminent le besoin de serre-fils séparés. Disponible avec une variété d'options de garniture (vendues séparément). Homologué UL pour les emplacements humides, le passage et le contact direct avec l'isolant et les matériaux combustibles ; Certifié CSA; Classé IP. Pour une version non classée IC de ce produit, voir Halo's H7RT.--Josh DettweilerCe qu'il y a dans la boîteBoîtier à ouverture de six pouces

3 connecteurs Quick Connect éliminent le besoin d'écrous de fil séparés ; 4 ressorts de remodelage sécurisent le logement et s'adaptent aux plafonds de 1/2 po et 5/8 po. À utiliser avec des ampoules/lampes à incandescence de 120 volts (non incluses, vendues séparément). Emplacement humide approuvé pour une utilisation sécuritaire lorsqu'il est utilisé avec certains luminaires encastrés. Contact d'isolement (IC), le boîtier encastré peut toucher et être recouvert d'isolant. Remodeler les boîtiers d'éclairage encastrés, idéal pour les installations sous le plafond pour ceux qui ont un accès limité ou inexistant.
Batteries Included? ‎No
Batteries Required? ‎No
Brand HALO
Brand ‎HALO
Certification ‎Csa, Ip, Ul
Color Silver
Color ‎Silver
Country of Origin ‎Mexico
Customer Reviews 4.4 4.4 out of 5 stars 247 ratings 4.4 out of 5 stars
Domestic Shipping Item can be shipped within U.S.
Finish ‎Nickel
Finish Type ‎Nickel
Included Components ‎HALO H7RICT, 6" Housing IC Remodel Housing 120V Line Voltage
Installation Method ‎Ceiling
International Shipping This item can be shipped to select countries outside of the U.S. Learn More
Is Discontinued By Manufacturer ‎No
Item Dimensions LxWxH 14.25 x 6.75 x 7.75 inches
Item Dimensions LxWxH ‎14.25 x 6.75 x 7.75 inches
Item model number ‎H7RICT
Item Package Quantity ‎1
Item Weight ‎0.28 Pounds
Item Weight ‎4.5 ounces
Manufacturer ‎EATON
Material Aluminum
Material ‎Aluminum
Part Number ‎H7RICT
Product Dimensions ‎14.25 x 6.75 x 7.75 inches
Size ‎Each
Style Art Deco
Style ‎Art Deco
Type of Bulb ‎LED
Voltage ‎1 Volts
Warranty Description ‎2 yr product warranty.
Wattage ‎50 watts

3.4

5 Review
5 Star
68
4 Star
14
3 Star
10
2 Star
4
1 Star
5

Donnez votre avis

Votre courriel ne sera pas publié. Tous les champs obligatoires sont marqués d'un*

Scritto da: LongIsland Retiree
Good value ,glad i read reviews
the template is a tiny bit small so i cut just outside the line i traced and it fit snugly ......the clips were a pain to set but worked.....all in all very pleased
Scritto da: Dan
Great housing cans for the price and install is a breeze
Great can for the price and ease of installation. I've installed 16 of these between my house and my parents house with no issue. The cans come with a template that is simple and easy to use for cutting. Has a small drill bit sized hole to use for centering which is useful in the template. Perfect size if you get a hole key to drill the holes for the cans. I used a drywall saw for 4 of these when I first started and it took forever ( 10-15 mins or so each can between trimming it for proper install etc). Bought an adjustable hole saw for about 30 bucks and it was beyond worth the investment for installing these (to do 4 it took about 10 mins) so I recommend going this route from the start. The template has instructions for installing the cans and the wiring too for reference if you're unsure about it. Be sure you measure though and assure that you have enough space above the can and around it. It sits sort of high and the junction box sticks out a bit. Wiring is super simple which is a time saver and not the usual strip and use an electrical wire nut. You pop open the junction box and you'll have a ground exposed copper wire, and a white and black wire. Pop open one of the slots on the box for your wiring to come into the junction box using a flat head screwdriver. Then strip your 14/2 NMB wiring and you push it into this connector on the wires from the can itself. There are 4 holes in each total, one is used by can wiring and then the others you can use (doesn't matter which hole) for the wiring from the ceiling to light to switch or what have you. Just make sure the wires are pushed in deep enough so they lock into place and won't come undone. You can see how much wire you get into there though since the casings are clear. Put all the wire back in the junction box and put the cover back on and wiring is done. Installing with the clips at first was tricky. Best way I've found is if you remove the black clips before pushing the can into the ceiling then you can push it in with very little to no resistance. With the clips installed at first I kept having a difficult time with the clips catching on the drywall. The can will sit flush and pretty solid into the ceiling as long as you cut the hole right (another reason the drill piece is worth it). Then just pop back in the retaining clips and push them into place. Make sure you don't have any crud or insulation under the clip when installing it because that will make it very difficult to properly lock in the clips. You can use a skinny flat head screwdriver to push insulation and stuff out of the way through the tiny slots. When you push and lock in the clips by hand they should be pretty stiff. To do a final lock though you need a flat head screwdriver again and have to push into the clip which has a small divet in it. Push it up and it firmly locks into place. I think a lot of people miss that part but it's in the directions too for installing. Push back the insulation on top of the can and you're done. Cans are not 100% air tight but I don't know of any that truly are that I've seen. You can use a small bit of fire block spray foam to insulate if you want for true air tightness due to the small slots in the can. As a whole though they are pretty tight, if you toss the insulation back on top of them then you're safe (especially if you have blown in insulation). Do this after installing everything though and be sure it's the fire block spray foam and not the typical spray foam in a can which is highly flammable.
Scritto da: Sal Fanale
Good product, easy to use and cheap.
I used several of these to add recessed lights to my home while I was remodeling. I definitely qualify as a DIY type of person so keep in mind my perspective of this item is based on my personal experience in my house as I completely rewired it myself, not as a professional electrician who may have experience with different brands of remodel housings. Over all it was pretty easy to install. The first thing is you need a 6-1/4" hole. I already had a good 6" holesaw so I assumed it would fit for this housing, but after cutting the first hole it was perfectly clear that was a no go. A quick trip to my local HD and I found an adjustable hole cutter with the electrical tools. It is exactly like this one sold on amazon (http://amzn.com/B001PI8S6O) but it was only ~$35 dollars. I have normal 1/2" sheetrock and that cheap cutter had no problems. Once I had the right sized hole this remodel housing slipped right in. Before I mounted it to the ceiling however, I pulled the 14/2 romex down into the room so I could work on the wiring from below instead of being hunched over in the attic. These housing have a nice connect end which makes it VERY easy to wire, practically without tools. You will need to install a wire clamp connector where you remove the knockout, but that's standard electrical code. Once I was inside it was just a matter of striping about 1/2" of the neutral and hot lines and pushing them into the connector. The nice thing is they give you a 6 port connector so you can EASILY daisy chain the next light in series without any additional work. Then I popped the cover back on and eased it into the hole I already cut. The last step is to push the spring clips up and in so they lock the housing against the sheetrock. I found this to be the one weakness. You have to put a good bit of pressure on the clips with a screwdriver to make sure they seat in the little notch, but not too much because the can itself is VERY thin metal and will easily bend if you over do it. After the first light, I got the hang of it and the remaining 4 went in easily. I deducted one star overall because the housing itself does feel pretty flimsy. Especially the arm connecting the can to the Jbox. Inside there is a standard light bulb socket, which my LED remodel trims addressed with another connector. Being IC rated it couldn't have been easier to install since I didn't even have to move my insulation, just pushed it up. Its nice they are airtight also to help prevent heat from leaking into the attic. All and all, a pretty easy process for the home DIY/first timer and probably even easier for a professional. The price was right too!
Scritto da: Deleena N
Just What I Needed
Swapped some old CFL (with ballast) new-construction (hammered into the roof joists) housing for these to use dimmable LEDs. Works just as intended.
Scritto da: Total Tech
As good as I remember
I've used these cans for about 20 years. They have changed very little in those 2 decades. Its been a while but I needed one remodel can for a remodel/addition project and the can worked out great. Nice metal quality. Not all banged up in shipping (although the box Amazon used was enormous). Wire connectors and strain relief worked nicely.

Produits connexes

Découvrez notre réseau international

Nous expédions dans 28 pays plus de 200 000 produits. Restez informé, inscrivez-vous à la newsletter.

Array